JSF Basics
This is a brief tutorial that takes a quick look at some of the very basics of JSF, how we define pages and hook them up to server side objects. Rather than cover the fundamentals of starting a new JSF application, I’m going to start from one of the Knappsack archetypes which can provide you with a JEE 6 application ready to roll. In this case, we are going to start with a servlet based example so you can run it using the embedded servlet containers.
To create the new project, we are going to use the following archetype GAV values. You can also read up on creating a new Knappsack application
groupId = org.fluttercode.knappsack
artifactId=jee6-servlet-basic
version=1.0.5
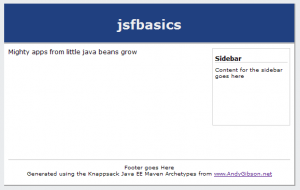
Once you have your project, just run mvn jetty:run in the command line and navigate to http://localhost:8080/jsfbasics/home.jsf. Ok, so now we are up and running, lets look at a JSF page and what it contains.
JSF uses a templating language called facelets. JSF 1 originally used JSP as its view language, but for JSF 2.0 Facelets became the defacto standards and was adopted as the standard view definition languages for JSF 2.0. In our application, we have a template file called WEB-INF/templates/template.xhtml. The template just has a lot of boilerplate view code but there are some ui:insert tags that mark places in the template where we should insert content. For example, the main content is inserted in a facelets area called content
<ui:insert name="content">Main Content</ui:insert>
These are insertion points which are used by pages that base themselves on this template. One of the great features of facelets is that the template defines the content points, while the page itself is used to define the template used and then push the content into the content points. This is much better than having to include page fragments in a JSP page, using a page decorator or using a template to include the content page. Our main page home.xhtml is one such page that uses this template.
home.xhtml
<?xml version="1.0" encoding="UTF-8"?>
<ui:composition xmlns="http://www.w3.org/1999/xhtml"
	xmlns:ui="http://java.sun.com/jsf/facelets"
	xmlns:f="http://java.sun.com/jsf/core"
	xmlns:h="http://java.sun.com/jsf/html"
	template="/WEB-INF/templates/template.xhtml">

	<ui:define name="content">
		<h1><h:outputText value="Hello From JSF" /></h1>
	</ui:define>

</ui:composition>
At the very top, in the composition tag, we tell Facelets that we want to use the file template.xhtml as our template page. Next we have a ui:define tag that defines the content that is to be used in the template. Facelets works by having the page pull the template into the page and pushing its content into the slots provided by the template. This is much better than pulling content into the main page using includes, or specifying a template used everywhere and decorating the content with it. This is the best of both worlds. Each page defines which template page it uses and pushes the content into it.
Our first used component
In here you can see we have used our first JSF component :
<h:outputText value="Hello From JSF" />
This is a standard JSF component that is used to output text. We could have just written the text right in the page, but the goal of this page is to test that the JSF configuration is working and to do that, we need to see if the JSF component is rendered correctly. You can edit the text in the value and obviously it will change the text displayed on the page.
Our first backing bean
Displaying static text isn’t what web frameworks were built for, what we really want is to display something that comes from some java code. To do this, we will create a backing bean which is a java object that is part of the web application that JSF is aware of. To create backing bean, create a new class and call it PageBean.
import javax.enterprise.context.RequestScoped;
import javax.inject.Named;

@Named
@RequestScoped
public class PageBean {

	private String message = "Mighty apps from little java beans grow";

	public String getMessage() {
		return message;
	}

	public void setMessage(String message) {
		this.message = message;
	}
}
The code itself is pretty simple. One field with a default value and getters and setters. However, we have a couple of new annotations at the class level. First is the @Named annotation that tells CDI that this bean has a name that be used to refer to this bean using EL expressions. Since we didn’t supply a name the default name of pageBean is used. The @RequestScope annotation tells CDI that this bean is request scoped so when it is created, it should last till the end of the current request and then be destroyed. This means that the next time we call this page, this bean will be re-created and a fresh version used which again will be destroyed at the end of the request.
Now we are going to change our application to display this message instead.From now on, we will just be showing the code within the ui:define statements:
	<ui:define name="content">
		<h:outputText value="#{pageBean.message}" />
	</ui:define>
</ui:composition>
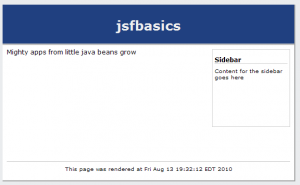
If we run the application now, you should see the message displayed on the main page:
Now let’s take look at a producer method that can be used to display the date and time the page was rendered. First, open up the template file and look for the footer panel at the bottom and change it to :
<h:panelGroup id="footer" layout="block">This page was rendered at #{currentSysDate}</h:panelGroup>
What is currentSysDate value? Well, we need to go back to our PageBean and define it. We will add a new method that returns a new Date object and we’ll annotate it with @Named and @Produces.
@Produces @Named("currentSysDate")
public Date produceDate() {
	return new Date();
}
The Produces and Named annotation tells CDI that this method can be used to produce a value with the name currentSysDate. When our application is deployed, CDI makes a note that this value comes from this method so when our page is rendered and JSF is looking for the value currentSysDate, CDI calls the method and returns the value obtained from this method.
If we refresh the page we can see that our new timestamp function is on there.
This will come in handy later on when we start using AJAX and want to check that the full page has not updated (the timestamp will stay the same because that portion of the page won’t change). We’ve shown how we can pull data from the server onto the page so let’s take a look at how we send data back to the server.
In our home.xhtml page, we’ll add a text input to edit the message and a button to post it back.
<h:form id="messageForm">
	<h:outputText value="#{pageBean.message}" /><br/>
	<br/>
	New Message : <h:inputText value="#{pageBean.message}"/>
	<h:commandButton action="update" value="Update"/>
</h:form>
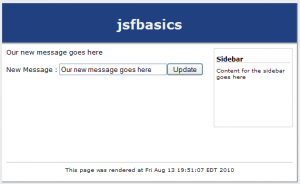
First, we added the h:form tags which gives us an HTML form in which to put input controls. Any data entry in a JSF page needs to be enclosed in a JSF form tag in order to be passed back to the server. We defined an input text box that was bound to the same value as the message display and a command button that is used to post the values back. If we refresh the page, enter a new message and click the button our message changes.
However, this is the age of Web 2.0, and just posting back a form and displaying the results isn’t enough, we need to do it with AJAX. AJAX is a mechanism by which the browser makes an asynchronous request to the server and gets a response back. When the response is returned, the browser will call a javascript function that will update part of the page instead of all of it. Sounds complicated, but the nice folks that wrote JSF wrapped all that functionality up in one little tag called f:ajax
What we want to do is make our command button an AJAX button which we can do by placing the f:ajax tag as a child tag of the button. All we need to supply the AJAX tag with is the execute and render attributes. This indicates which parts of the page we want to post back to the server, and which parts we want to re-render when the response comes back. We want to execute the form and re-render the form, so we could use the component id (messageForm) for the attribute values. JSF also provides a couple of shortcuts that we can use. The value @form references the form the button is in so rather than hardcode the form id, the @form value will let us reference the form without doing so by name.
<h:commandButton action="update" value="Update">
	<f:ajax execute="@form" render="@form" />
</h:commandButton>
Notice that now you have an ajax button, the timestamp in the footer doesn’t change when you post the value back.
Performing Actions
So far we have covered displaying information from the server side bean and writing values back, but often we want some user action to execute some code on the server.
Start by adding a Integer attribute on to our PageBean class and two methods, one to increase it, and another to decrease it as well as getters and setters for the value.
	private int value = 0;

	public void increase() {
		value++;
	}

	public void decrease() {
		value--;
	}
In the view, we want to display the value and have a couple of buttons to increase and decrease the value. Add the following view code in home.jsf somewhere between the h:form tags :
<h:panelGroup layout="block" id="spinner">
     <h:commandButton action="#{pageBean.decrease}" value="-" />
     #{pageBean.value}
     <h:commandButton action="#{pageBean.increase}" value="+" />
</h:panelGroup>
Refresh the page and click away, and you’ll notice something is wrong. Press the increase button and the value goes to 1, click it again and it…goes to 1. Click the decrease button and it will always go to -1. The problem is an issue of state. Each time we click the button, we post back to the server, and the server creates a new instance of the pageBean and calls the increase or decrease methods. The problem is that each time we create the bean, the value starts at zero and so is only ever increased to 1 or decreased to -1.
Now you may be wondering that since you are displaying the value on the page, isn’t that enough to post it back to the server, after all, we displayed the message in an input box and it got passed back to the server. The difference is that an input box is known as a JSF value holder, which means it actually holds the value it is bound to on the client and posts it back to the server when the form is posted back. We can see this demonstrated by changing the value text display component to an input text box component:
<h:panelGroup layout="block" id="spinner">
    <h:commandButton action="#{pageBean.decrease}" value="-"/>
    <h:inputText value="#{pageBean.value}"/>
    <h:commandButton action="#{pageBean.increase}" value="+" />
</h:panelGroup>
Now when you click the +/- buttons the value changes beyond -1 and 1. This is because when the page is rendered, the value is stored on the client. When the button is clicked and the form is posted back, the client side value is sent back to the server side attribute and then the increase/decrease method is called with the value that is set. This is fairly common with web forms, and one way of handling state by putting it in client side forms, even as hidden field values.
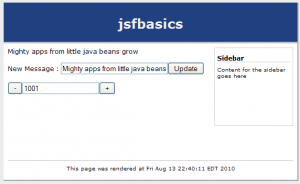
We can demonstrate this further by manually entering a value into the text input and then clicking a button. Enter 1000 in the input text box and click the increase button. The value should now be 1001.
When we manually enter a value, we are changing the value held on the client in the value holder represented by the input text box. When we click the increase button we are sending that value back to the server. On postback, the server creates an instance of our PageBean class, sets the value attribute to the value in our text box (1000) and then calls the increase method which increases the value to 1001. Once the method has finished, JSF then must render a response which includes taking the value from the pageBean.value attribute and putting it in our text box which is how the text box shows 1001 after clicking the button. At this point, once our request is complete, the page bean is destroyed as it is only request scoped.
Validating the value
If we only want the value to be between 0 and 10, we can add validation annotations onto the value field to enable it to be checked for correctness when we post back the values. In our PageBean class, we’ll add the annotations as follows :
@Min(value=0)
@Max(value=10)
private int value = 0;
We also need some way to display error messages if the user enters an invalid value so we’ll add a h:message tag. The message tag is used to associate a JSF message with a component and display it. We give the input text box a name and add the message for that component :
<h:panelGroup layout="block" id="spinner">
	  <h:commandButton action="#{pageBean.decrease}" value="-"/>
	  <h:inputText value="#{pageBean.value}" id="valueInput"/>
	  <h:commandButton action="#{pageBean.increase}" value="+" />
	  <h:message for="valueInput" styleClass="errorMessage"/>
</h:panelGroup>
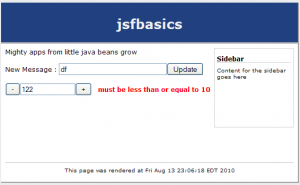
Now refresh the page and enter 1000 into the value text input and click the increase button. You should see an error message next to the text editor because the value is above 10. Try entering the value of -1000 and clicking a button.
2 thoughts on “JSF Basics”
Comments are closed.
Thanks for taking the time to write this up. A question: you use the @Produces annotation to mark the currentSysDate as something to be obtained from CDI. Couldn’t you just use #{pageBean.currentSysDate} on the facelets page? When is @Produces appropriate to use?
You’d have to renamed the method to follow the JavaBeans spec of course: getCurrentSysDate